I have been curious about intellij since droicon uk 2011, where I noticed that some of the speakers were using IntelliJ instead of eclipse.
A post from Richard Hyndman, who is a developer advocate from Google, was the final straw that pushed me to download IntelliJ and give it a try.
The first thing an eclipse user will notice in intellij is how slick and fast compares to the behemoth which is eclipse. On the other hand, an you can feel a bit disoriented at first.
Setting up a new android project using IntelliJ is pretty straightforward. You can follow the nice tutorial from jetbrains website http://wiki.jetbrains.net/intellij/Android.
For this reason, I will not write about how to set up an Android project in intellij here.
What I am going to write about is how to setup an android project with intellij and integrate robolectric with it.
I really like robolectric. It makes unit testing for android a lot faster as it would be on the emulator. What's more, you can use mockito with it.
Mockito is a mocking framework that makes a lot easier to mock your java objects.
Mockito does not work with dalvik jvm, but robolectric makes your tests run on your pc's jvm.
Despite robolectric provides instruction on how to setup an intellij project manually, I have tried that process a lot of times, carefully checking if I was missing a step.
However, I did not manage to get it working. The guys from Pivotal provide also an intellij starter project, which you can configure to point a git repository https://github.com/pivotal/AndroidIntelliJStarter
However, I was not either satisfied with this solution and, inspired by this post , I tried to setup a maven solution and to import it in intellij afterwards.
This provides another great benefit, which is the fact that I can import the same project in my linux netbook without bothering for relative paths in eclipse projects.
So, here are the steps I had to follow in order to get it working:
- Install the android sdk. This is trivial, I assume you are comfortable with that
- Let the ANDROID_HOME environment variable point the path where you uncompressed the android sdk
- You need to have at least one version of the sdk installed, so if you haven't yet, you should launch the sdk manager that is the "android" executable on ANDROID_HOME/tools/android. Install also the extras, such as the compatibility library, admob stuff and all the libraries you find at the bottom
- install the maven android sdk deployer you can find at https://github.com/mosabua/maven-android-sdk-deployer and then install it.
I read somewhere that you can get android jar without relying on it, but in any case, if you need google maps or other private apis like that you still need to use this tool.
I use the latest (almost) version which is 4.0.3, so I run mvn install -P 4.0.3
- Install maven android plugin. The easiest way is to use android archetypes from here:
https://github.com/akquinet/android-archetypes
Finally, you are now ready to generate your first maven android project:
mvn archetype:generate \
-DarchetypeArtifactId=android-quickstart \
-DarchetypeGroupId=de.akquinet.android.archetypes \
-DarchetypeVersion=1.0.8 \
-DgroupId=your.company \
-DartifactId=my-android-application
You could find an issue. Recently the tree of the android sdk folders has been slightly changed. Maven android plugin expects them to be in the updated version (I don't remember what the differences where). However, if maven complains it cannot find android related stuff, and your sdk has been installed for some time, a good option would be to remove the sdk and reinstall it from scratch (at least the part you download with the sdk manager).
At this point, you have a working maven project, which you could already open with intellij. What is still missing is the robolectric dependencies.
Nothing more easy, all you have to do is to add
right below android dependencies. You should also create the test folder, under src/test/your/package/
Now, a problem I had was that I had to change the pointer of the repository in order to have robolectric 1.2 working.
At this point, you should be able to open the pom.xml with intellij.
Now, to have robolectric working from intellij, you still need to make a couple of changes:
- the order of include of jars does not respect the one you specified. What's more, you will likely to get the STUB! error because android jar is included before junit and robolectric.
All you need to do is to move the android jar below junit and robolectric
- you need to manually specify the javadocs for android. You do this by highlighting android jar, pressing the little edit in the lower left corner.
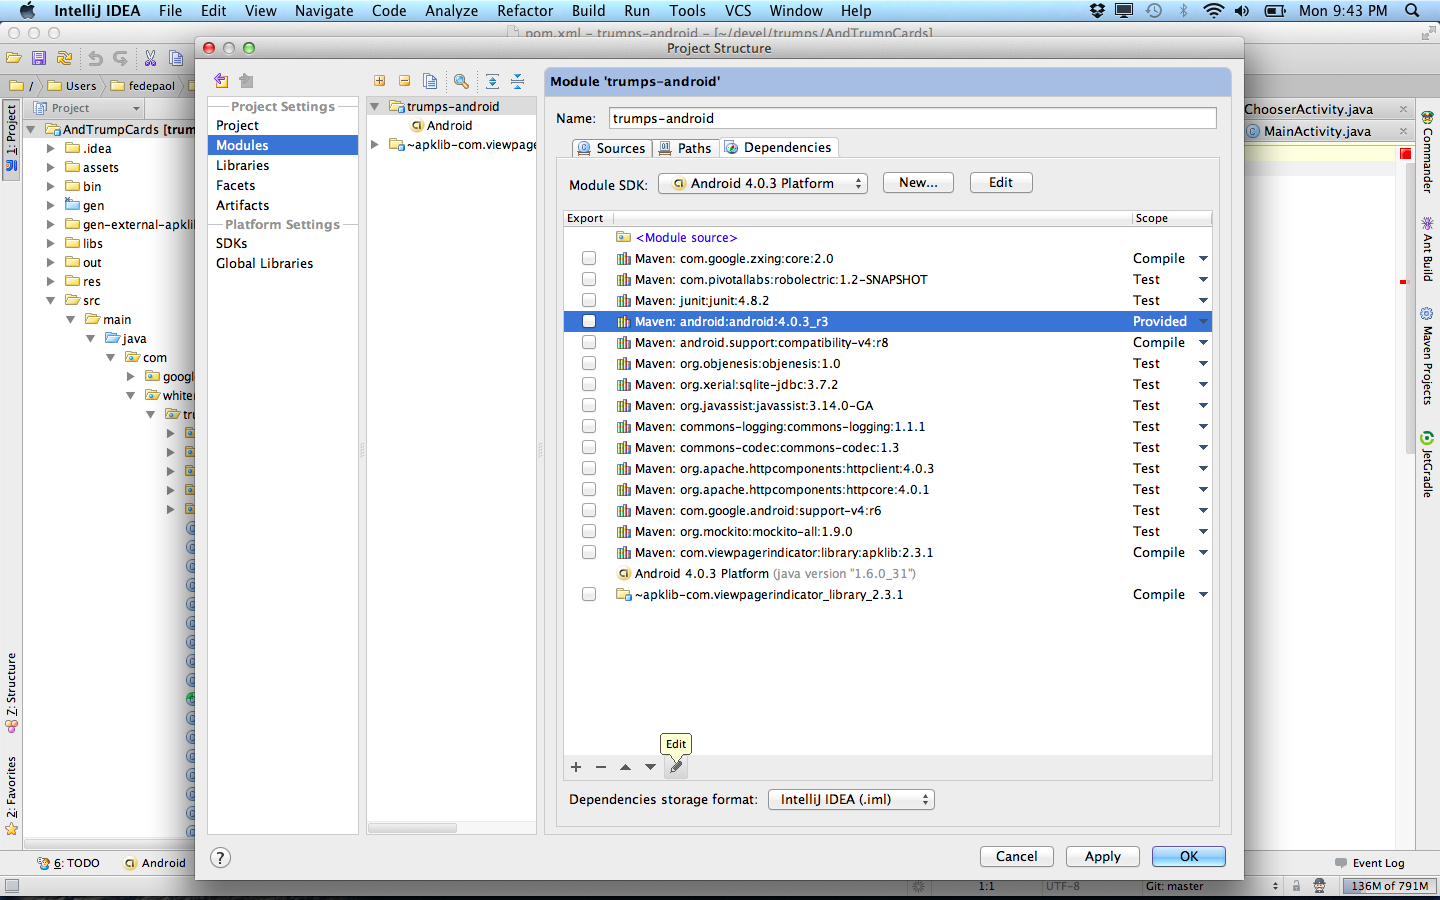
and pressing the plus sign. Then you choose "Attach files or directories", point the path related to your android docs,
which is /docs/references under your ANDROID_HOME. Finally, you declare that it's related to javadoc.
Now you are _almost_ ready to start. You made all this mess because you want to have robolectric working with intellij.
You need to create, right under src/ folder, the following path:
src/test/java/ YOUR_PACKAGE
where you are going to include your unit tests, and you are done!
If you liked this post, please consider following me @fedepaol .
Comments
I added here https://dl.dropbox.com/u/3092639/pom.xml a working pom.xml I am currently using. I just tried to mvn clean install from a clean checkout and it looks to be finding robolectric. I hope you are missing something which you can correct using this example. Ping me if you can't
I added the sonatype repository stuff, and it's not finding robolectric. Not sure why.
This comment has been removed by the author.